Shield Nickel Die Clashes
"Clashed dies" are created when the obverse and reverse dies for a coin hit each other in the coining press without a coin planchet between them. The clashing of the dies will transfer some of the obverse design to the reverse die and some of the reverse design to the obverse die. If the dies are not polished to remove the imprints left by the die clash, then coins struck from those dies will show portions of the obverse design on the reverse, or portions of the reverse design on the obverse, or both.
If we assume that the dies are installed as they normally were so that a coin struck has a 180 degree turn from the obverse to the reverse, then the clash marks will be upside down and mirrored right to left when they appear on the coin. Additionally, because the dies have incuse devices (at least for shield nickels - there are coins that have incuse devices and therefore raised devices on the die), it is the fields of the design that will clash most strongly. On coins produced from the clashed dies, one sees the transferred parts of the design as elements outlined by the fields of the design. Finally, clashed dies will only show clashed design transfer in the fields of each die because the design elements are protected from the clash by being incuse.
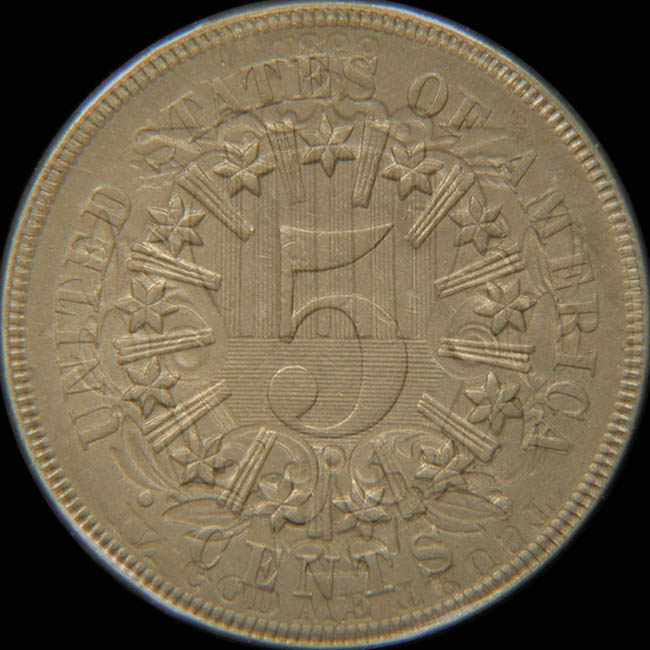
Wow, that's pretty hard to visualize. So naturally, some pictures will make it easier. Here are two overlay pictures showing the alignment of the dies when clashed. The first picture shows an obverse die in the background with a reverse die transparently on top. The second picture is the opposite - a reverse die in the background with the obverse die transparently on top. Both of these pictures are the With Rays type of shield nickel. For the No Rays type, simply ignore the rays between the stars.
Strongly clashed dies are rare to find in the shield nickel series!
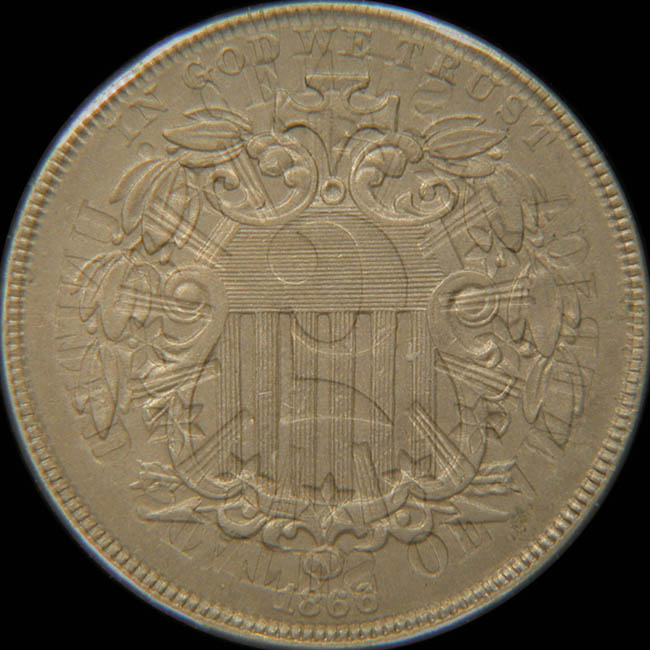
Positioning of the Reverse Die on Top of the Obverse Die When Clashed
Positioning
of the Obverse Die on Top of the Reverse Die When Clashed
Here are pictures of the obverse and reverse of an 1867 (No Rays) shield nickel showing strong clash marks. The first photo is the obverse. Within the shield, marked by white arrows, we see the clash marks resulting from the big 5 on the reverse. In order to visualize the 5, look at the space between the clash marks - you will see the shape of an upside down and backwards top flag of the 5. Remember, with a clash raised marks in the field outline the design that was clashed into the die. Green arrows mark clash marks that outline stars from the reverse.
If you mouse over the following picture, an image of the 5 from the reverse will appear in the appropriate position to help you see the effects of the clash.
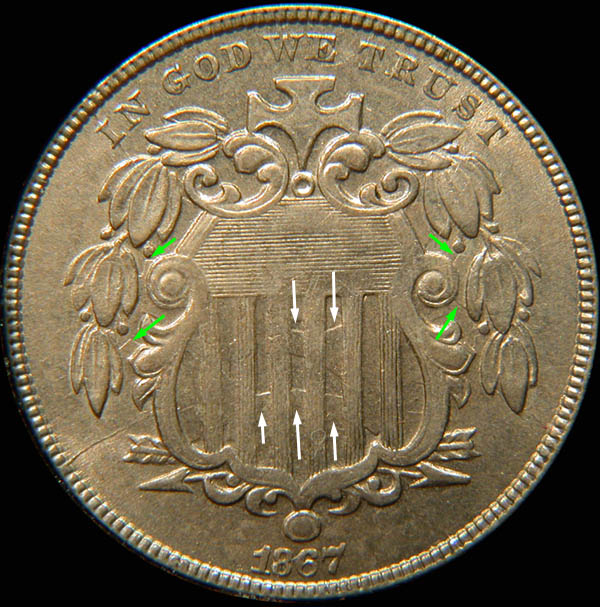
1867 No Rays Showing Clashed 5 from the Reverse Die
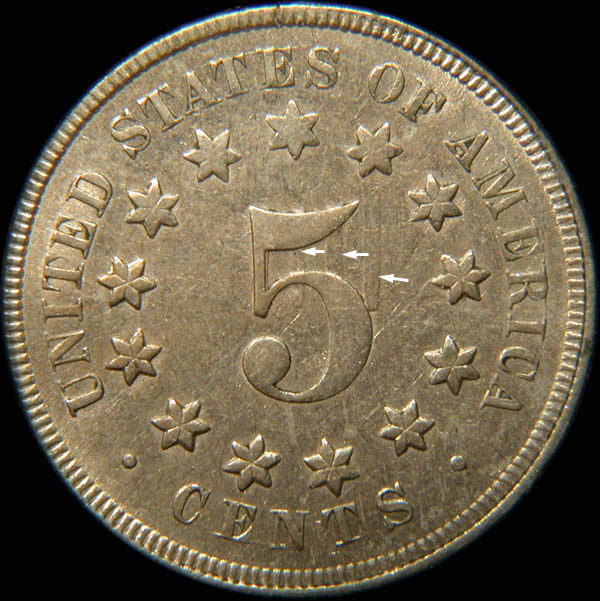
Here is the reverse of the same coin. White arrows point to clash marks from the obverse shield. The raised areas pointed to by the white arrows are the spaces between the vertical columns from the obverse.